The mortise-and-tenon joint is the structural basis of most traditional Canadian furniture and timber frame construction. It predates metal fasteners and remains in use because nothing holds a rail-to-stile connection — or a rafter to a plate — with the same long-term reliability. Cutting it well requires a specific set of hand tools, each with geometry matched to the demands of the operation.
The Mortise Chisel
A mortise chisel is not a paring chisel that has been hit with a mallet. The two tools serve different purposes and are built to different specifications. A mortise chisel must withstand repeated mallet blows and the significant leverage forces involved in prying out waste. The geometry reflects this.
The blade cross-section is thick and often slightly trapezoidal (wider at the top than the sides) to resist sideways racking during chopping. The steel is typically O1 or equivalent tool steel, hardened to around 60 HRC — soft enough that the edge is resilient rather than brittle, hard enough to hold an edge through softwood and hardwood alike. The bevel angle is steeper than a paring chisel: 30 to 35 degrees is common, versus 20 to 25 for paring.
The handle, traditionally turned from ash, beech, or hornbeam, is designed to absorb mallet impact. A metal ferrule at the base of the handle prevents the wood from splitting where the blade tang meets the shaft; some designs add a second ferrule or a leather washer at the striking end to distribute mallet blows.
Sizing follows the width of the mortise. Common widths are 6 mm, 8 mm, 10 mm, and 12 mm (or their Imperial equivalents: 1/4", 5/16", 3/8", 1/2"). The chisel should match the mortise width exactly — this allows the sides of the chisel to register against the walls of the mortise and guide the blade straight down.

Marking Gauges
Before a chisel touches the wood, the mortise must be marked precisely. A marking gauge — a wooden or metal fence sliding on a beam, with a scribing pin or blade at one end — transfers a measurement from the fence edge to the surface at a consistent distance.
For mortise-and-tenon layout, two gauges are typically needed: one set to the width of the mortise (used to scribe the side walls), and one set to the depth offset from the face (used to mark the shoulder line). Using two gauges rather than resetting one gauge between operations eliminates the small errors introduced by re-setting.
The pin type (a sharpened metal point) scores a V-groove in the wood surface, which is visible but can tear the grain when crossing perpendicular fibres. A wheel-type gauge (using a small cutter wheel rather than a pin) severs the fibres cleanly and is preferred on hardwoods where a ragged scribe line would be visible after planing. Saddle squares or a combination square with a knife line is used for the shoulder lines, where a sharp V-groove serves as both layout line and a registration for the saw.
The Tenon Saw
The tenon saw is a fine-toothed back saw — a saw with a stiffening spine of folded brass or steel along the back edge — used for the shoulder and cheek cuts that define the tenon. The spine limits the depth of cut but provides the rigidity needed for accurate straight cuts.
Tooth geometry matters for both directions of cut. Rip teeth (filed straight across, perpendicular to the blade) cut efficiently along the grain for the cheek cuts. Crosscut teeth (filed at an angle to create a knife edge) cut across the grain for the shoulder cuts. Some craftspeople use two saws; others use a general-purpose tenon saw with a tooth geometry that performs acceptably in both orientations.
The set of the teeth — the amount each tooth is bent outward to create a kerf slightly wider than the blade — should be minimal on a tenon saw. Heavy set produces a wide kerf that is difficult to guide precisely against a knife line. A well-tuned tenon saw with light set and a freshly sharpened crosscut profile leaves a surface that requires minimal paring to fit.
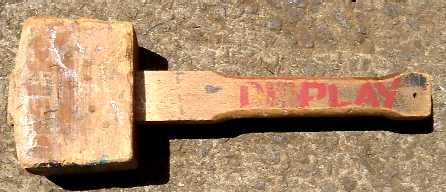
Mallet Geometry and Weight
The joiner's mallet is typically made from a close-grained hardwood (beech and lignum vitae are traditional choices; hard maple is common in Canadian shops) and is sized to match the work. A heavier mallet delivers more energy per blow with less effort — useful for heavy mortising in thick stock. A lighter mallet gives more control for fine paring cuts.
The face of the mallet is typically angled rather than flat, so that when held in normal use the face meets the chisel handle squarely. The exact angle depends on the user's grip and wrist angle; purpose-made mallets are often adjusted at purchase or made to the specific craftsperson.
Rubber or dead-blow mallets are sometimes used in lieu of a wooden mallet, particularly when driving assembled joints together without marring the surfaces. They are not equivalent for chopping operations — the lack of rebound from a dead-blow mallet changes the feel of the operation in ways that most experienced craftspeople find counterproductive for precision work.
On selecting a mortise chisel: A single 8 mm mortise chisel handles a wide range of joinery work. If acquiring tools incrementally, a 6 mm and a 10 mm cover most situations in furniture and door construction. Timber frame work requires wider chisels — 16 mm, 20 mm, or 25 mm — and the heavier mallets to match.
The Coping Saw and Fretsaw in Joinery
While not primary joinery tools, the coping saw and drawknife have specific roles in mortise-and-tenon construction. The coping saw is used to remove waste from enclosed cuts — removing the bulk of material from a wide mortise before final chopping with the chisel, or cutting the curve of a shaped tenon shoulder.

Fitting and Adjusting
The final step in mortise-and-tenon work is the fit. A well-fitted joint should require hand pressure to bring together the final 10–15 mm, and mallet force to close fully. A joint that closes easily by hand will move in use; a joint that requires excessive force risks splitting the mortise wall.
Adjustment is done with a paring chisel — a longer, thinner chisel with a shallow bevel, used without mallet force to remove thin parings from the tenon cheeks or the mortise walls. The shoulder plane (a narrow rebate plane with a blade that extends to both sides of the body) is used to deepen or adjust the tenon shoulder if it does not seat flat against the mortised piece.
Checking the fit with a light source at the back of the joint reveals gaps between the tenon shoulder and the mortised face. Any visible light indicates a gap that will either be visible in the finished piece or will allow movement. Closing that gap — by paring the tenon shoulder straight or by levelling a high spot on the mortised face — is the final adjustment before glue-up.
Regional Notes
Joinery tool selection in Canada reflects both the available species and the traditions brought by early European craftspeople. British immigrants brought the preference for heavy beech-handled mortise chisels; French-Canadian joinery traditions, particularly in Quebec furniture, sometimes used narrower chisels at higher angles with lighter mallets, adapted for the dense figured maple and birch common in that region.
A small number of Canadian toolmakers have produced mortise chisels domestically. Most production joinery tooling currently in use in Canadian shops is sourced from British manufacturers (Narex, Crown, Blue Spruce) or from Japanese suppliers whose chisel geometry — hooped ferrules at both ends, white oak handles, blue steel blades — has been widely adopted by craftspeople working in hardwoods.
Updated: May 1, 2025